We wanted to create fast awareness for our new Recording Studio product, so we made a 60‑second highlight video entirely in Goldcast: recorded in Recording Studio, edited in Content Lab, and posted to LinkedIn the same day. The twist: we used our Agentic Video Editor to auto‑add zooms, music, and callouts, then layered lightweight product overlays to keep it social‑friendly.
What You’ll Learn
- A VO‑first workflow to create a product highlight video
- How to use AI to create a dynamically edited video
- An easy way to promote products and features to your target audience
Expected Results
- Same‑day turnaround from first take to live post
- An engaging yet polished video asset that can be used across channels
- Noticeably higher reach and engagement vs. static posts
Step 1: Script and record your video
Start with a 60‑second script. Anand generated this specific one in ChatGPT by feeding it our product, messaging, and enablement inputs, then edited and tightened where necessary. He then recorded the video in Goldcast Recording Studio and used the teleprompter feature to have the script right in front of him. Do 1–2 test reads to dial in teleprompter scroll speed and eye‑line.
Go on stage in Recording Studio. Toggle off the name card and border for a clean look, although you could edit this in Content Lab during post-production as well. Record your voiceover in one continuous session—even if you flub—then do 2–3 passes so you have options. The safety net is in editing.
💡 Pro Tip: Keep it strictly as a voiceover when recording. Showing the product as a screen share here will likely bloat runtime. We’ll add product visuals later as overlays.
Step 2: Edit, automate, and add overlays in Content Lab
Your file lands in Goldcast Content Lab shortly after you’re done recording. Trim out the misses or create a clip from the best section. Then run the Goldcast Agentic Video Editor using the Engaging Monologue recipe to auto‑add zooms, b‑roll, background music, and caption polish. Watch a few times to review the flow and AI edits that were made, making any updates or adjustments as needed. (You can also give the editor custom instructions vs. using a pre-built recipe)
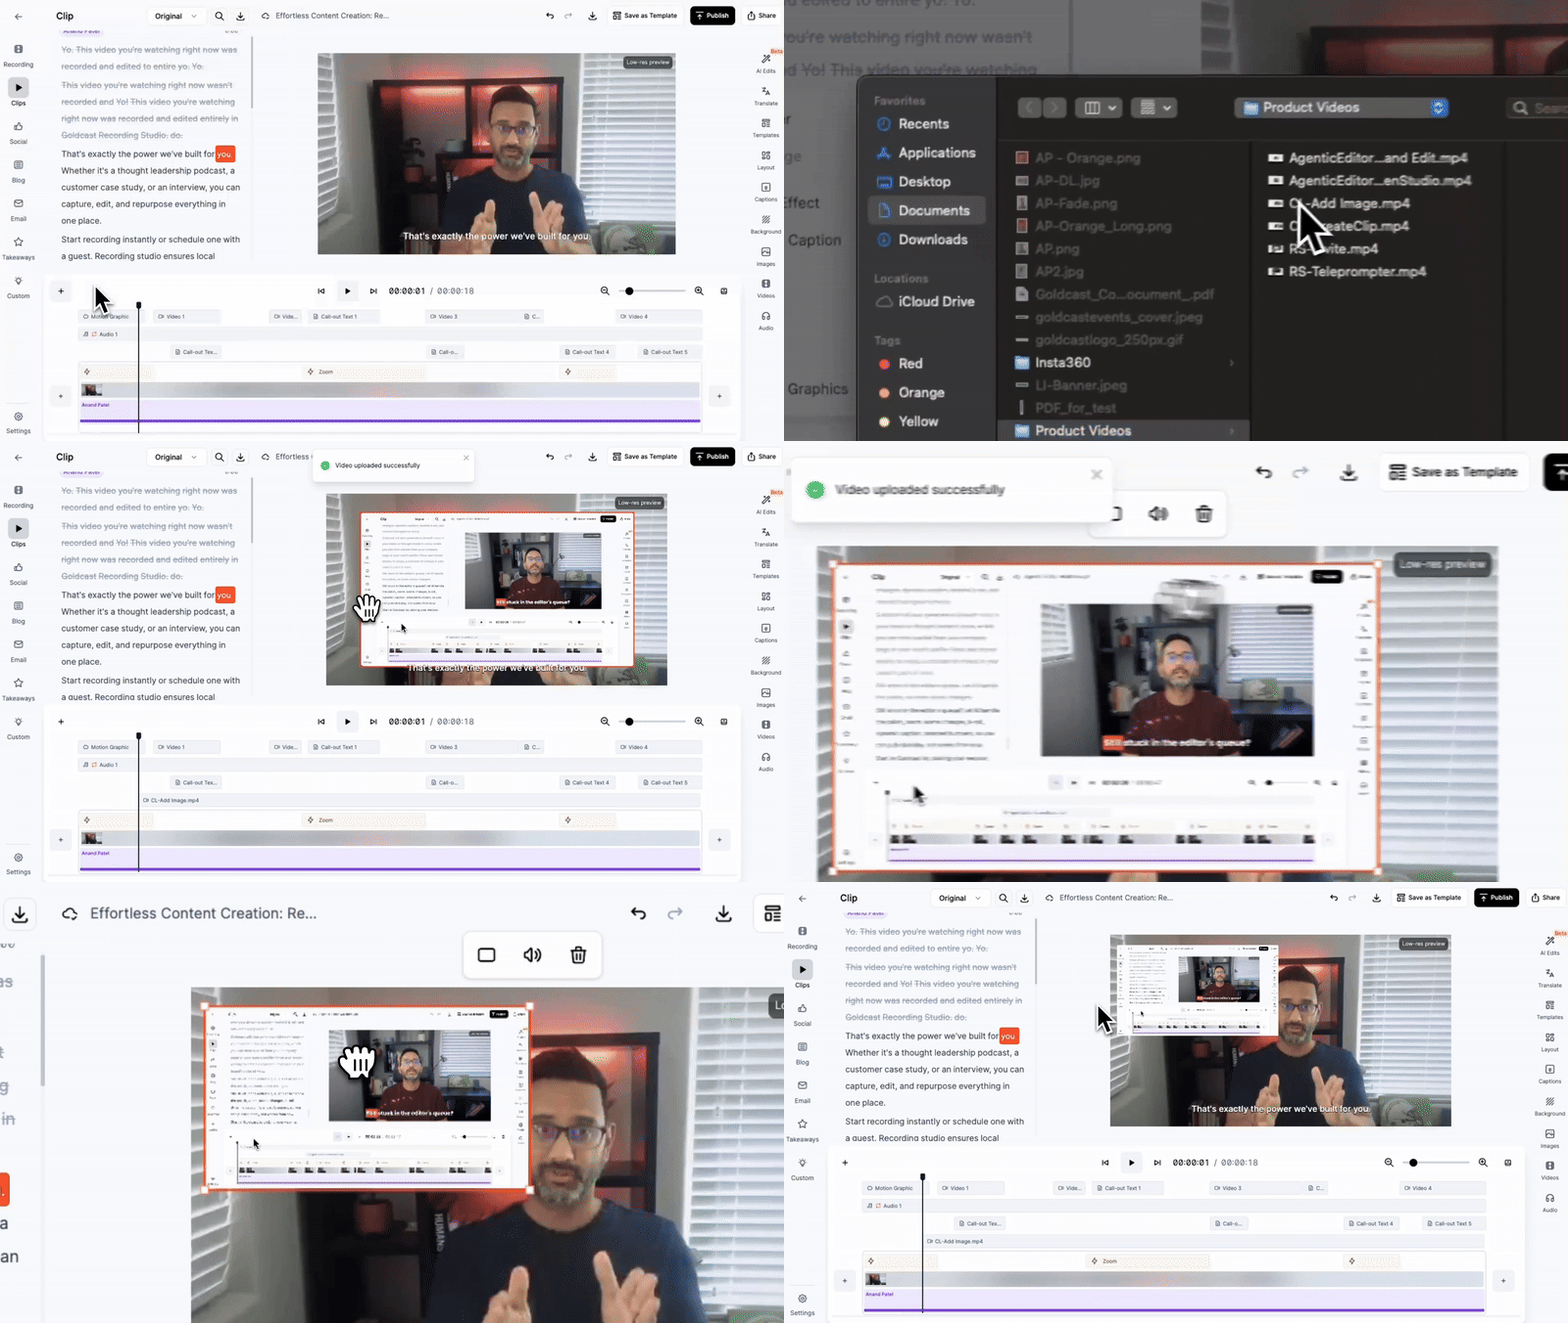
Next add in any relevant product visuals as overlays. For this specific video, Anand added two simple overlays: (1) a quick video on how to start a Recording Studio session and (2) a video on how to make quick edits in Content Lab.

Record these as short screen captures, then drop them in as a picture‑in‑picture overlay on top of your video. You could also have the overlaid video take up the full screen with a single click, kind of like a b-roll. Anand used Screen Studio to record these product videos but you can also capture them in Recording Studio.
🔥 Hot tip: Use callouts to highlight key benefits (e.g., “Local 1080p capture” or “Edit + publish in minutes”). The Agentic Video Editor will identify and callout these moments for you if you prompt it to.
Step 3: Post on LinkedIn and boost to target
Export your final, polished video. Write a tight hook with solid value-driven social copy (or generate on‑brand social copy in Content Lab). Post organically on your social media channel of choice, then add a modest boost to get in front of target accounts and lookalikes. Anand posted this directly on his LinkedIn account and then our Growth team added a small budget behind it to boost it as a thought leadership ad.
Leave the budget running long enough to rack up initial reach and make sure to engage with the comments to keep momentum.
Results
The boosted LinkedIn post got decent results:
- 13,000+ impressions
- ~5,000 people reached
We’ve generally seen video-based thought‑leadership ads, like this one, drive ~4.3% CTR vs. ~0.9% on standard posts.
P.S. Here's an example of a product highlight video where we used full screen product visuals instead of picture-in-picture.
Create engaging, AI-edited videos today!
Learn how you can capture and edit dynamic video content, without even having to bother your editor.


 Upcoming Events
 Event Series
 On-Demand Events


